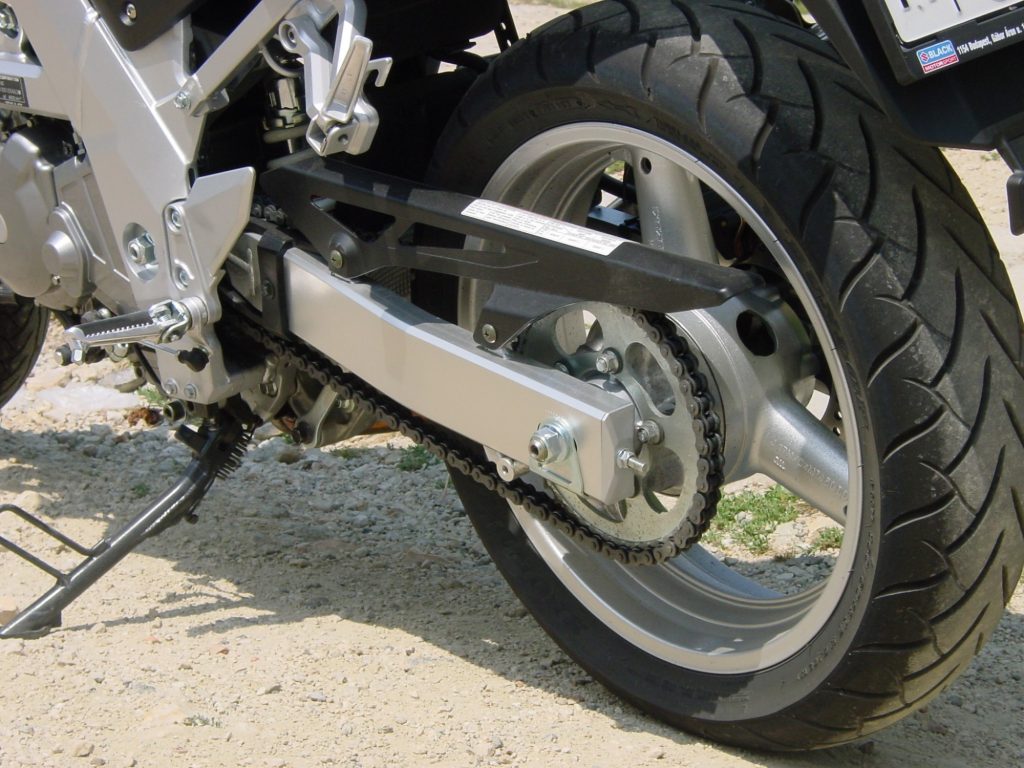
Every motorcycle comes with a chain, and it’s not there for decorative purposes.
Motorcycle enthusiasts and pros would tell you all about the importance of motorcycle chain maintenance, and how much it can affect your cycle’s performance.
Basically, if your motorcycle’s chain isn’t functioning properly, you’re not going anywhere any time soon.
Thankfully, if you’re a first-time motorcycle owner or you’re looking for a refresher on how to maintain your motorcycle’s chain, you’ve come to the right place.
Keep on reading for our full breakdown on the basics of motorcycle chain maintenance. We’ll cover the key five tips you’ll need. Also, we’ll talk about the different types of chains you can have, and when it’s time to finally get a replacement.
The Types of Motorcycle Chains
Before we start our deep dive into the maintenance tips, let’s make sure you have a foundational understanding of the two main types of motorcycle drive chains.
There are the roller ones and the sealed ones.
The roller chains are considered to be quite basic. They’re strong, inexpensive to produce, and rather simple in design. Unfortunately, those ones need to get regular lubrication and maintenance to prevent their gears and different parts from seizing.
On the other end of the spectrum, you have sealed chains.
Those ones are self-lubricating. By using a nifty piece of technology, the lubricant can get injected into the gap between the pin and the bush. Yet, this doesn’t mean you get to leave it maintenance-free.
Regardless of your type of motorcycle chain, you’ll need to keep it clean and regularly lubricated.
What Makes Motorcycle Chain Maintenance Critical?
Your chain is made up of different components. There are the bushes, the rollers, and the plates. With your regular run-of-the-mill chain having an excess of 100 links, there are a lot of parts that move around.
Whenever you take your bike out for a ride, you’ll be getting some dirt, dust, and even road debris kicked up and stuck in and around your chain.
The more often you take out your bike, the faster the dust and debris accumulate, which tends to wear away at your chain.
Of course, if you’re ever on the market for getting a title loan on motorcycle, you’ll want to have a well-maintained bike ready.
Motorcycle Chain Maintenance 101
Generally, and for the majority of bikes, you’ll want to do your routine chain maintenance every 500 miles or so. Of course, this time range can stretch or shrink depending on your riding conditions and your bike type.
Regardless, you’ll want to get out your nitrile gloves and do the following tips.
1. Assess Your Bike Chain
The very first step is putting your bike on its side stand. This will allow you to take a close look at your chain and assess whether it needs to be tightened or just cleaned and lubricated.
If you have a vertical play of approximately 1.5 inches or so, then you’re fine. But, if it gives you more than that, you’ll want to tighten your chain.
After you’ve done this step, you can get your back wheel off the floor by using a paddock stand, the main stand, or even a wheel roller.
2. Check for Tension
You can gently rotate your rear wheel by hand. This way you can check the bottom run of your chain for the appropriate tension in the tight spots.
Take your time during this step. And, make sure you don’t start your engine to run the wheel at any point in time.
If you find that the chain needs a bit of tightening, you can loosen up your rear axle bolt to free up your right and left adjusters.
Then, you can move those adjusters to push your wheel backward until you reach the right chain tension.
3. Clean up Your Chain
When you’re rotating the wheel by hand, you can take advantage of this opportunity and soak your chain in a degreaser.
By using a chain brush, you’ll want to work in the fluid between the links. Afterward, you can leave it for 10 minutes or so, just to make sure that you’ve given the degreaser enough time to work its way in.
4. Lube Your Chain
You can rinse and dry your chain properly with rags, so you’re ready to spray your motorcycle chain with a specialized lube.
Start from the bottom row of your chain and move upwards. And, aim for the backlink, then gently rotate the wheel to get an even coating.
5. Last Check-Up
At this point, you’re almost done.
You’ll want to double-check everything. For instance, if you’ve adjusted your chain, you have to confirm that all the nuts and bolts are in their right places and tightened correctly.
Moreover, check your chain lube’s instruction for the right time period to let the lube set in. It tends to take an average of 30 minutes or so.
Your Motorcycle Chain Needs to Go: The Key Signs
When you follow a strict maintenance routine for your motorcycle chains, you can expect your chain to have a long life.
Yet, nothing is built to last forever.
Here are some of the common signs that you’ll need to replace your motorcycle chain as soon as possible.
Rust
Once moisture has made its way to your chain links, rust will tend to develop quickly in the high heat conditions surrounding your chain.
If you’ve seen rust forming on your rollers and pins, it’s time to get a replacement. This is a strong indication that the seals have been damaged.
Stuck Links
If your chain links are fluttering around or have some kinks, you might assume that your links have been stuck.
Yet, you’ll want to ensure that the seals are still functioning and keeping the dirt and dust away from the pins. If the seals fail, then you’ll need to replace your chain.
Ready to Take Your Bike for a Ride?
We know that it can be a bit overwhelming for a bike owner to do their own motorcycle chain maintenance for the first time.
Hopefully, our guide with the key five tips on how to keep your motorcycle chain sparkling clean has demystified the process for you.
If you enjoyed those tips, you’ll want to check out our auto section for more advice on how to take care of your machine.


